Planning for a new home on your property
After your permit has been approved and your house is either close to done or completed, your sales representative will notify you that the Set Up & Delivery team will contact you within a couple of days to say hello and set up a good time to meet on-site for a site visit.
The purpose of this visit is to help set expectations as well as proactively investigate any additional challenges. For a simplified list of what steps are needed to properly place a new modular ADU or home on your property, you can skip to the bottom.
Obstacles, soil and excavation
Depending on the soil and the season we could make quite a mess. Most of the time we are able to final grade pretty well and run a rake over the lawn but sometimes when we’re dealing with sticky wet clay we do what we can to get rough grading done, the idea being that someone can landscape when things dry up and firm up. Many inspectors are cracking down on and no longer accepting only straw. Occasionally, there is a chance we’ll need to hydroseed or spread barkdust. ADUs and Tiny homes placed in Portland may pass final erosion inspections with grass seed with peat moss spread on top.
We excel at removing obstacles like fences and shrubs that may be in our way, and for an additional fee, we can reinstall the fence. However, we prefer to leave fence construction to the experts. Excavation generates a significant amount of displaced dirt—expect multiple dump truck loads by the time we’ve dug the foundation and utility trenches. Rest assured, we’ll restore everything as best as possible. However, please note that excavation can often damage or destroy any grass in the affected area.
Identifying foundation and utility locations
Using stakes, the footprint of the home is identified on your property. If the on-site markers differ from the site plan we’ll most likely have to go to get the site plan revised at the permit office. While this isn’t exactly a big deal, it has the potential of setting us back a couple of days.
We’ll dig around and do a deep dive into the utility connections. We may dig holes with a shovel, crawl into the crawl space, look in the garage, etc to figure out exactly what we’ll be tying into. We’ll also need to measure distances for material ordering quantities. If we have a hard time finding your utilities we may have to call in a private locator to help us out. This is not very expensive and can save a lot of time. If you’ll be getting a new meter from NW Natural or another provider, we’ll ask you to sign a service agreement.
Erosion control and tree protection
The necessary precautions for placing a new structure vary by location. Before we begin, we’ll install wattles (straw logs), silt fencing, and street drain protection for the erosion control inspection. Additionally, we’ll set up fence posts and a chain-link barrier to safeguard the trees on your property. A tree inspector will need to review these measures before we proceed with construction.
As the foundation excavation begins, we’ll typically only dig for the utilities at this point if we won’t be able to get excavator access after the house is in place. Forming of the foundation itself typically takes less than a day to do.
Now that it’s time to place concrete, a truck with a tow behind concrete pump will be dispatched. Its hose can be up to a few hundred feet long. The pump operator puts the sections of hose together until it’s long enough to reach the foundation. Then a big concrete truck rolls up and before you know it the foundation is poured. Depending on your road situation this can be tight for traffic and may take a little pre-planning with parking spaces.
For any needed backfill, we’ll get onsite with the steam shovel and grind and clank around until we have a rough final grade. The purpose of this grading is only to get the house in place as easily as possible. The final grade will come later.
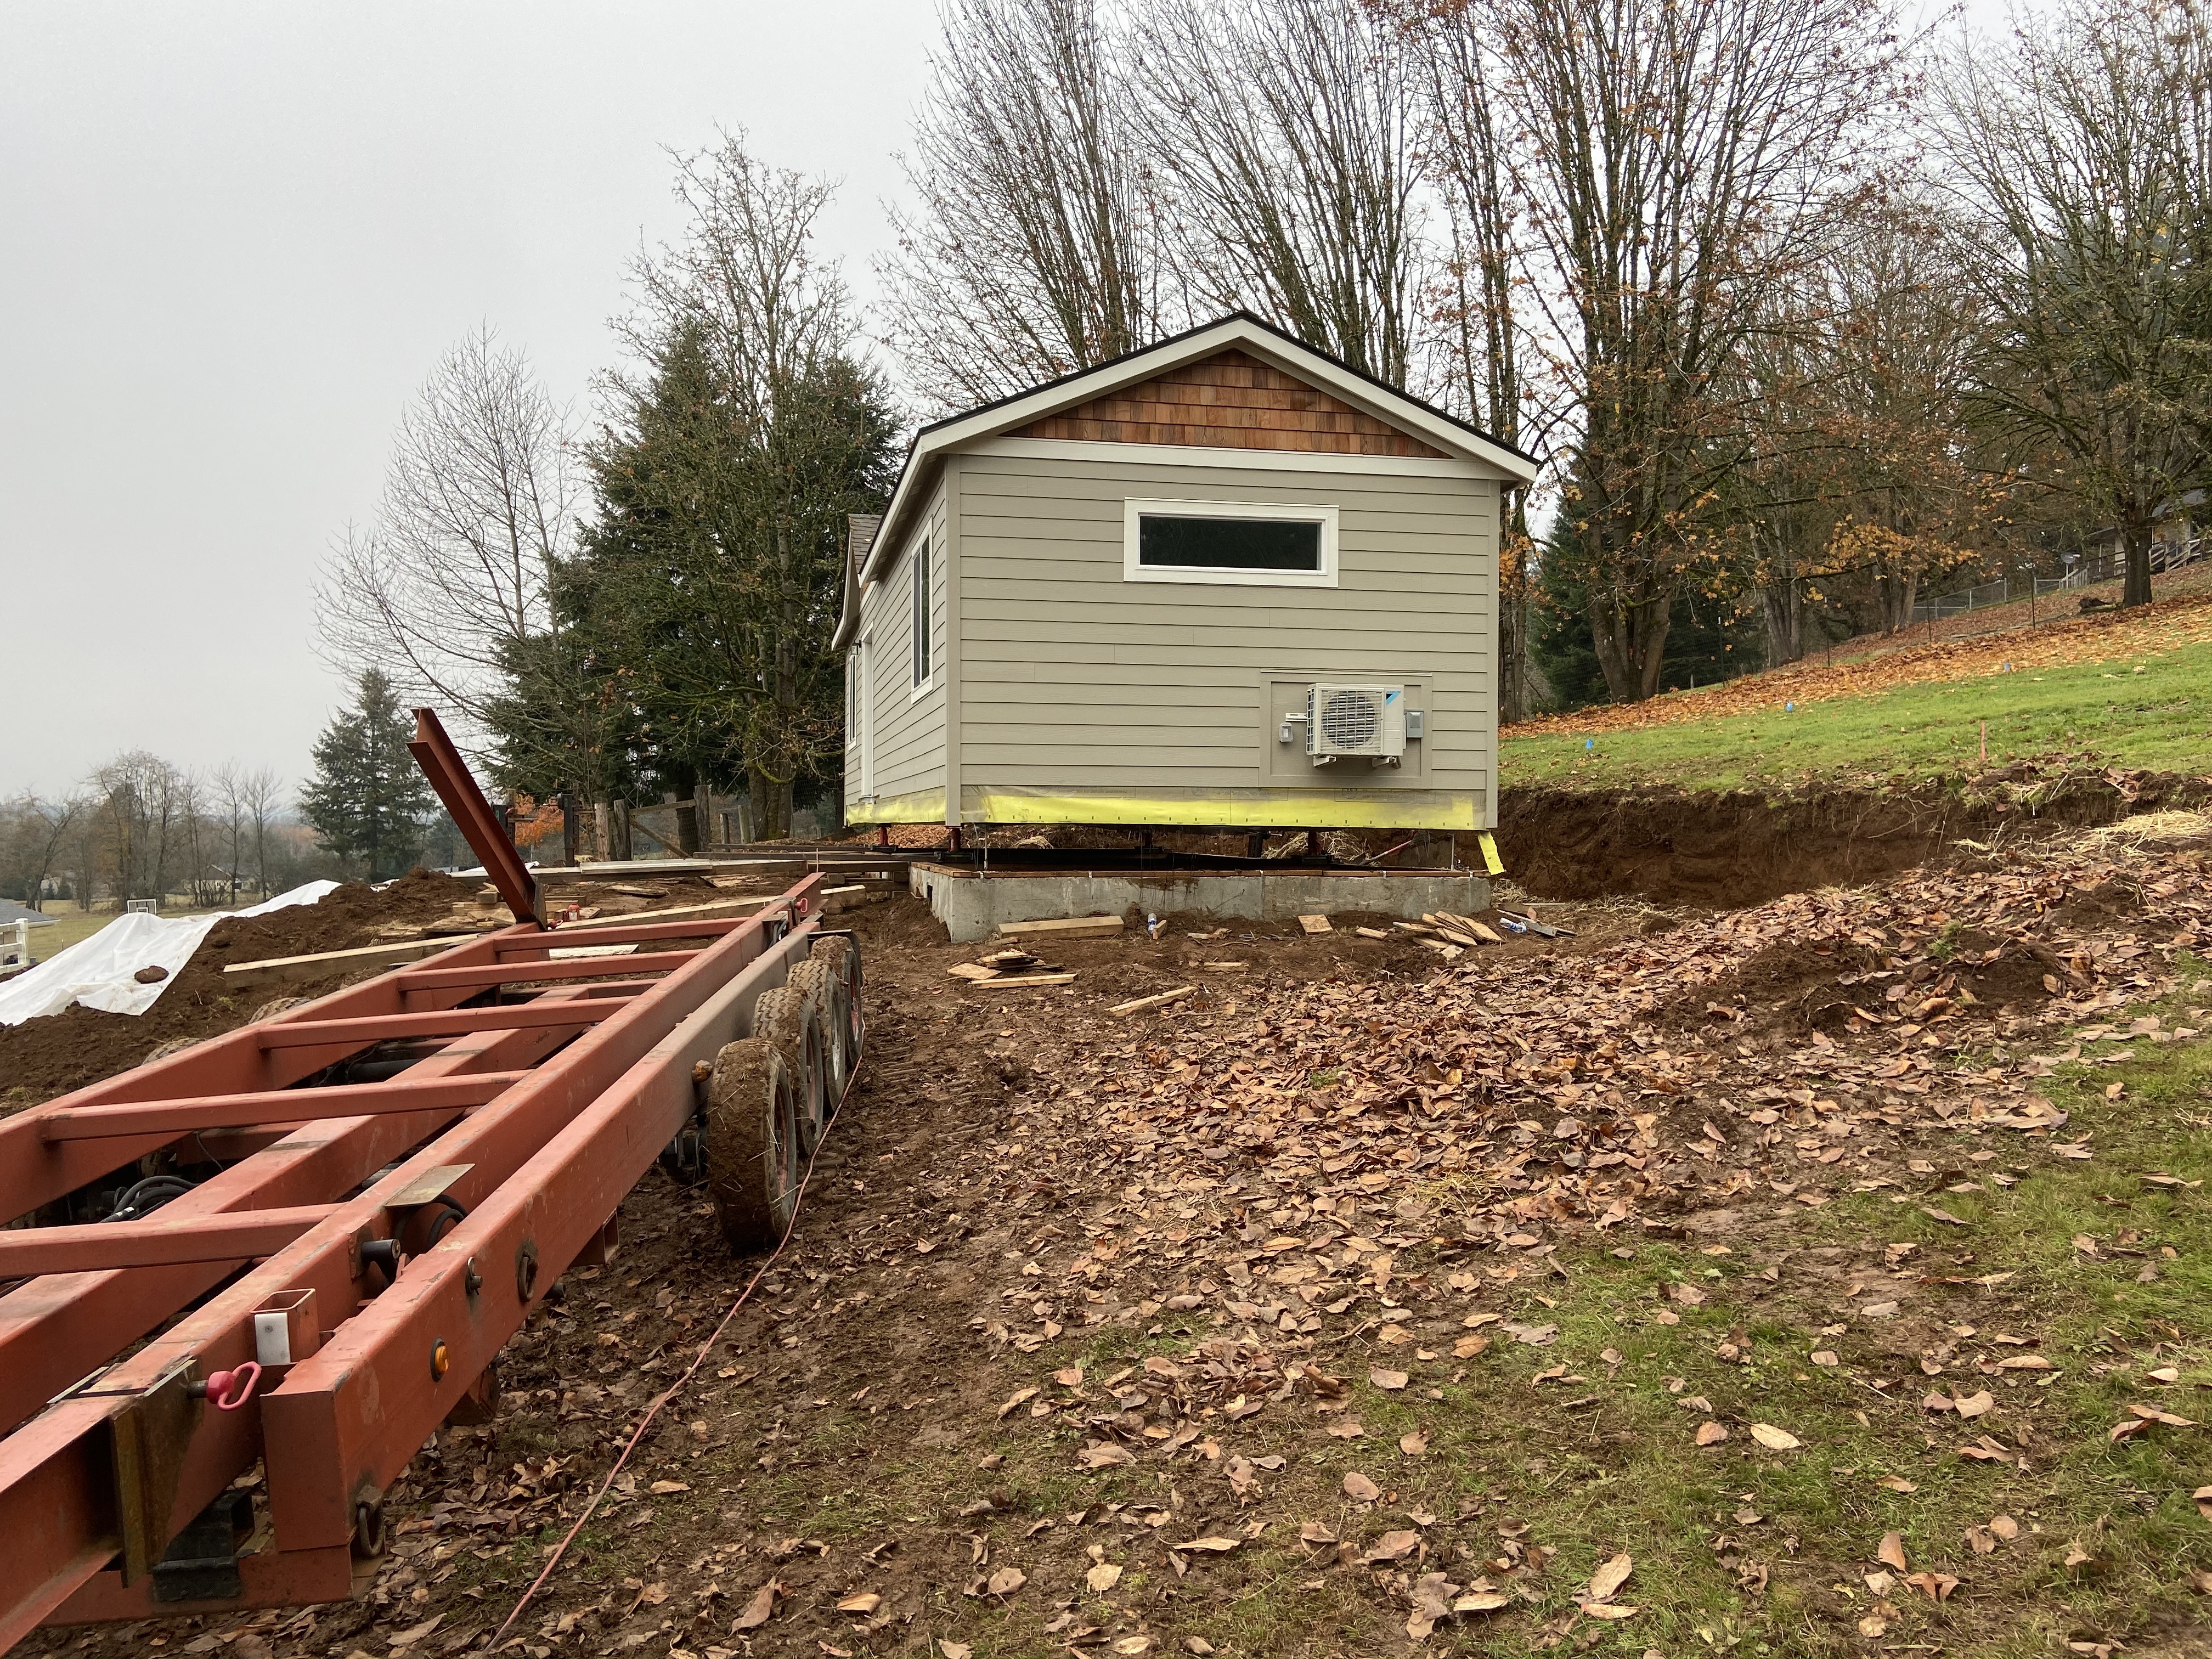
Delivering a modular accessory dwelling unit
At this stage, we’re ready to deliver the modular home, a process that typically takes most of the day. Our team usually arrives between 11 AM and noon, though this timing can vary by a few hours. Depending on the site conditions and the complexity of the move, the delivery may extend into a second day. Once the home is positioned, we’ll move straight into setting up the utilities.
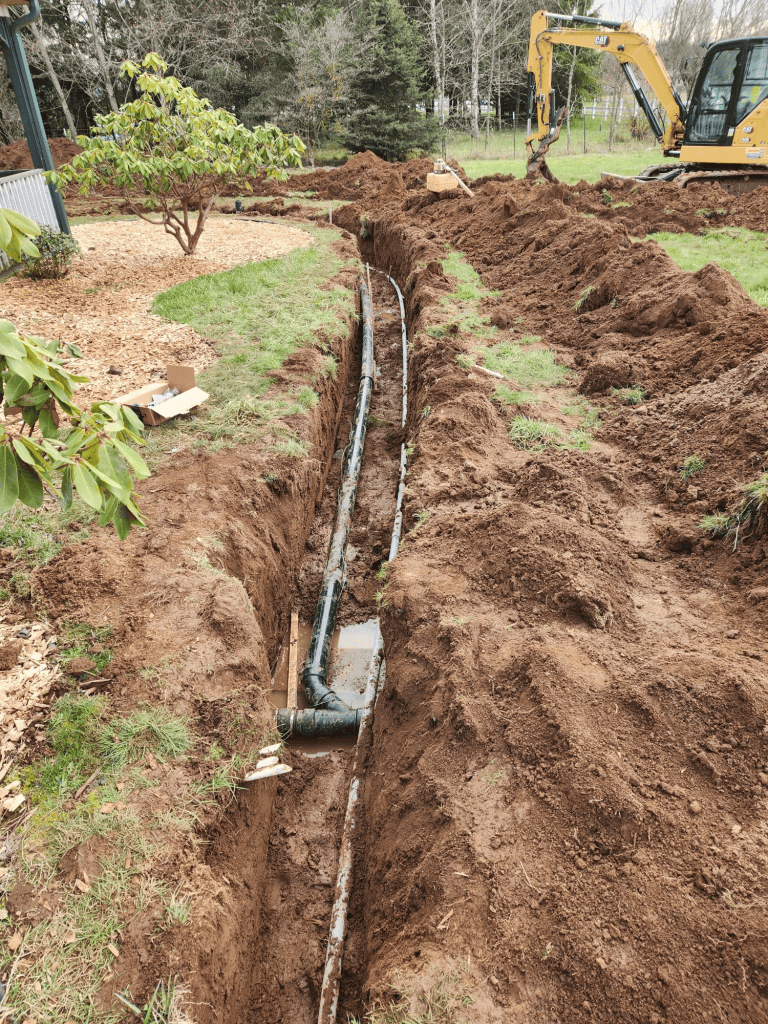
To connect all necessary utilities, we’ll be digging trenches throughout the site. Depending on your sewer setup, some trenches may need to be quite deep—we’ve gone as deep as 11 feet to tie into a sewer line. This process displaces a significant amount of dirt, but we do our best to keep the site, the street, and ourselves as clean as possible. Trenching and utility connections typically take a few days, followed by an inspection. Expect the area to be fairly disrupted for about 4 to 5 working days.
After utilities are connected and inspected, we backfill all the trenches and get serious with the excavator. This is where we try our best and we ask you to remember that landscaping just isn’t in our makeup, even if it looks like it is. After going at it with the excavator we’ll run a rake over the site if it’s rake-able. Once we’ve got the grade where we want it, we do the final erosion control. Depending on what is required at your location we may not do final erosion control on the same day as the final grade.

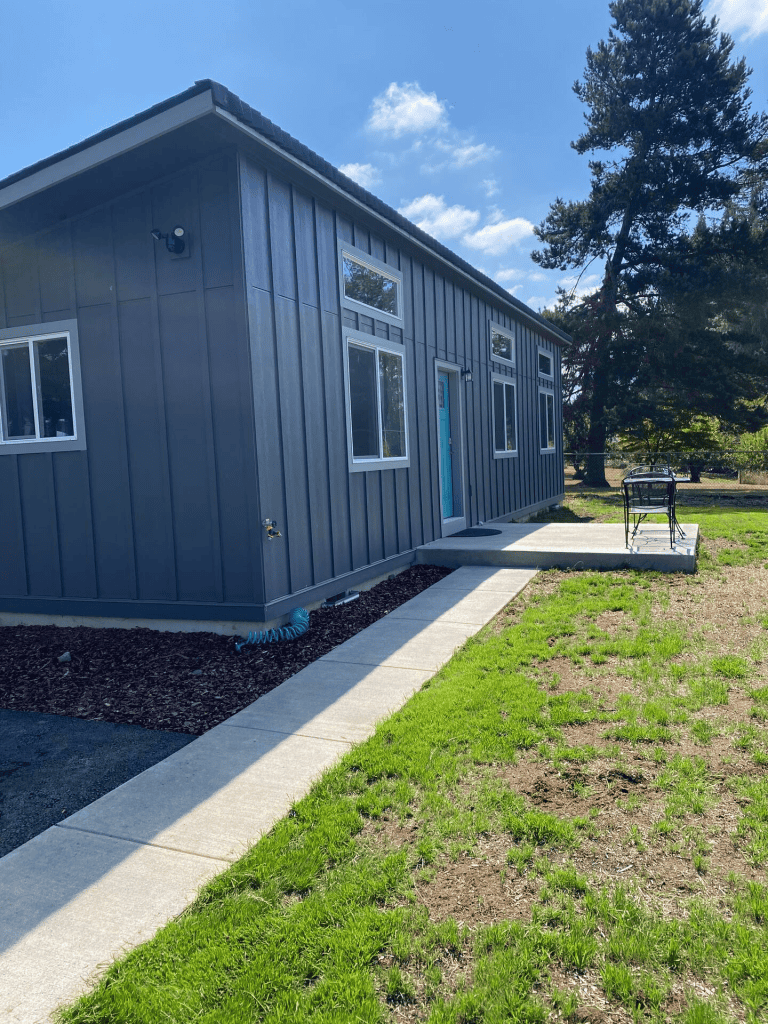
We finish the siding, deck, covered porch, paint, drywall crack repair or any other touch-ups needed after transportation. Depending on what options you picked this may take around a week of work. After all jurisdiction requirements are met, we’ll call the final inspection. Once finished, a Wolf Industries employee will perform one last cleaning of the home. This is when you can expect us to email you a final invoice.
Final Walkthrough
At the start of our final walkthrough, we present you with the project binder—an awesome resource packed with useful information! Inside, you’ll find details like paint types and colors, manuals, warranty paperwork, maintenance instructions, and more. During the walkthrough, we’ll highlight a few key things, such as how to clean your HVAC air filter. Once everything is reviewed, we’ll finalize the warranty paperwork and leave you with a copy. While this step is mostly a formality, know that if any issues arise, just give us a call! We truly value our customers, and we WILL take care of you!
Here’s a simplified checklist of our tiny home set up and delivery process laid out step-by-step.
Site visit
- Exchange contact info; verify correct info for daily contact
- Set landscape expectations
- Make Note to share
- Bring permit to site
- Mark out corners of house
- Locate utilities and measure lengths
- Make parts list for utilitie connections
- Bracket project extents for utility locates
- Take pictures to post to Note
- Have customer sign NW Natural service agreement.
Erosion control/tree protection
- Install erosion control
- Install tree protection if necessary
- Call in necessary inspections
- (Portland) Post erosion concerns poster/write permit number and address on poster
Excavation
- Mark offsets to keep location accurate
- Dig foundation
- Dig utility trenches if foundation or house will limit excavator access
- Install necessary erosion control
Forming
- Form footings and stem walls
- Install vents: (4) for models B, C; (6) for model E do not interfere with hold down anchor locations
- Install rebar
- Install grade nails
- Install hold down anchors at proper measurements to match house all thread
- Bring mudsill anchors for inspector to witness
- Install UFER ground at least 12” from ground level
- Install necessary erosion control
- Call necessary inspections
Pour Concrete
- Spray forms liberally with form oil
- Pour footings at a 4” slump and the walls at an 8” slump
- Rough grade concrete with gloves
- Wiggle the wall to even out the top of concrete
- Trowel top of concrete to provide smooth finish
- Install mudsill anchors; Flush with outside of wall; Refer to shear schedule for spacing; One anchor 6” from end of each mudsill board (12’ long)
- Make sure UFER ground is protruding toward the inside of the foundation at an angle
Backfill / Mudsill
- Remove forms and load on truck/trailer to be brought back to shop (do not leave concrete forms onsite)
- Make sure top of concrete is level and free of debris
- Install mudsill on foundation
- Move dirt to rough location needed for final grade
- Backfill with house delivery in mind
- Trench for utilities if house will if house will limit excavator access
- Install necessary erosion control
House delivery
- Move the house over foundation and lower into place
- Install shear plywood
- Connect hold down straps or all thread
- Spread plastic over dirt in crawl space
- Extend radon vent down to ground and tape plastic around tee
- Put radon vent warning sticker on radon vent
- Install dryer vent
- Use only hard pipe
- Use maximum of (1) screw per joint
- Tape all joints
- Start drywall repair
- Re-tape if existing tape is broken
- Carve out mud and use existing tape if existing tape is in good shape
Trenching
- Pothole utility connections
- Make list of needed material for the utility connections
- Dig utility trenches
- 24” wide if gas and electrical will be in the same trench
- 24” wide if water and sewer in same trench in CRWWD
- Water to be 24” deep in Portland ◦ Install necessary erosion control
Plumbing
- Install under house plumbing
- Connect bath sink and shower together before connecting to main line directly downstream from the toilet
- Connect kitchen sink and washer to main line downstream of bathroom group
- Install two-way cleanout 24” from house at exterior
- If using ejector pump
- Use all pressure pipe and fittings
- Do not use transition glue under any structure
- Tie into top 90 degrees of mainline
- Make sure vent pipe leaves room for gutter
- Make sure underground pipes are properly sloped and bedded
Flush water pipes thoroughly before connecting to house
- Install tracer wire for water and drain
- Extend ¾” cpvc pressure relief pipe to within 24” of ground
- Extend ¾” pvc condensate drain to drain in appropriate location
- Put plumbing on test
- Call necessary inspections
Electrical
- Install conduit
- Upsize conduit if over 150’
- Schedule electrician
- Report length of conduit run
Gas
- Install underground gas line with 12” separation from electrical
- Install union and gas valve directly outside of tiny house
- Install tracer wire
- Put on test
- 15 psi using a 30 psi gauge
- Call inspection
Final grade
- Back-fill trenching
- Slope grade away from house
- Try to make decks less than 30” off final grade to avoid handrails
- Spread topsoil at trench back-fill if necessary for existing lawn reconstruction
- Install necessary erosion control
Deck/siding
- Install deck per local code
- Handrail if 4 or more risers
- Guard rail if deck is more than 30” above ground
- Risers are within 1/4” tolerance
- 3×3 gravel landing at bottom of steps
- Per standard details if larger than standard 40”x40”
- Install siding over shear plywood
- Caulk joints
- Silicon threshold
- Touch up all exterior paint
- Final Inspection
- Call final inspection
Final
- General cleaning
- Schedule final cleaning
- Sweep up large debris
- Make sure there is no mud on outside of house
- The final cleaning of the outside of the house is the delivery crew’s responsibility
Paint
- Final crack touch-up
- Final paint touch-up on outside and inside of house
Plumbing
- Check that the shower valve’s temperature safety mechanism is not inhibiting the valve’s full range of motion
- Make sure water heater operates normally
Electrical
- Check all lights and fans to ensure proper function
- Make sure all appliances are plugged in and working
Doors/windows
- Make sure door is sealing against threshold
- Test all man doors to ensure proper latching
- Make sure all cabinet doors are properly aligned
- Make sure windows slide and latch properly
HVAC
- Spray air filters clean
- Pour water into coil drain pan to test condensate drain
- Test to ensure proper function
Customer
- Ensure customer is happy and has no issues
- Ask/Bring customer sweatshirt
- Ask for a review online
Final Walkthrough
- Present paper copy of final invoice
- Present project binder, explain each section briefly
- Sign warranty sheet, both parties sign both copies, one copy for each party
- HVAC filters and operation
- Explain switch next to indoor unit
- Static pressure vent (leave open)
- Explain moisture situation
- Range, explain broiler drawer if equipped, show how to adjust low setting on burners
- Explain extra switch by sink if no sink grinder is installed
- Explain air transfer fans if installed (model E)
- Show water shut off location
- Show sewer clean out location
- Explain outdoor HVAC maintenance, none except possible coil clean after 5-10 years, do not pressure wash it can bend the coils.
- Show water heater strainer and explain that both cords always need to remain plugged in.
- Answer any questions.
For more info and photos visit our Delivery and Setup page